M0BPQ Amateur radio
  • M0BPQ Home
  • Radio Blog
  • APRS
  • Equipment
  • Clubs
  • QSL
  • Photos
  • Contacts
  • G5YC
  • What's new?
  • For Sale

Chinese desk microphone

2/7/2012

2 Comments

 
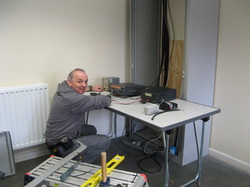
I usually use either a fist microphone or a headset when on the air, but my recent experiences at GB2GP have shown me that a desk microphone is useful when operating a special event station as it is easier for visitors to use on the air.

GB2GP has two radios that don’t have microphones at the moment so I looked into building a couple of electret gooseneck desk mics from the ARRL handbook. Once I had costed up some parts that weren’t in my junk box this project felt too expensive until I saw PC desk mics on ebay for only £2 each. At that price I bought a couple and they arrived this morning. The external quality looked just fine - so far so good

Picture
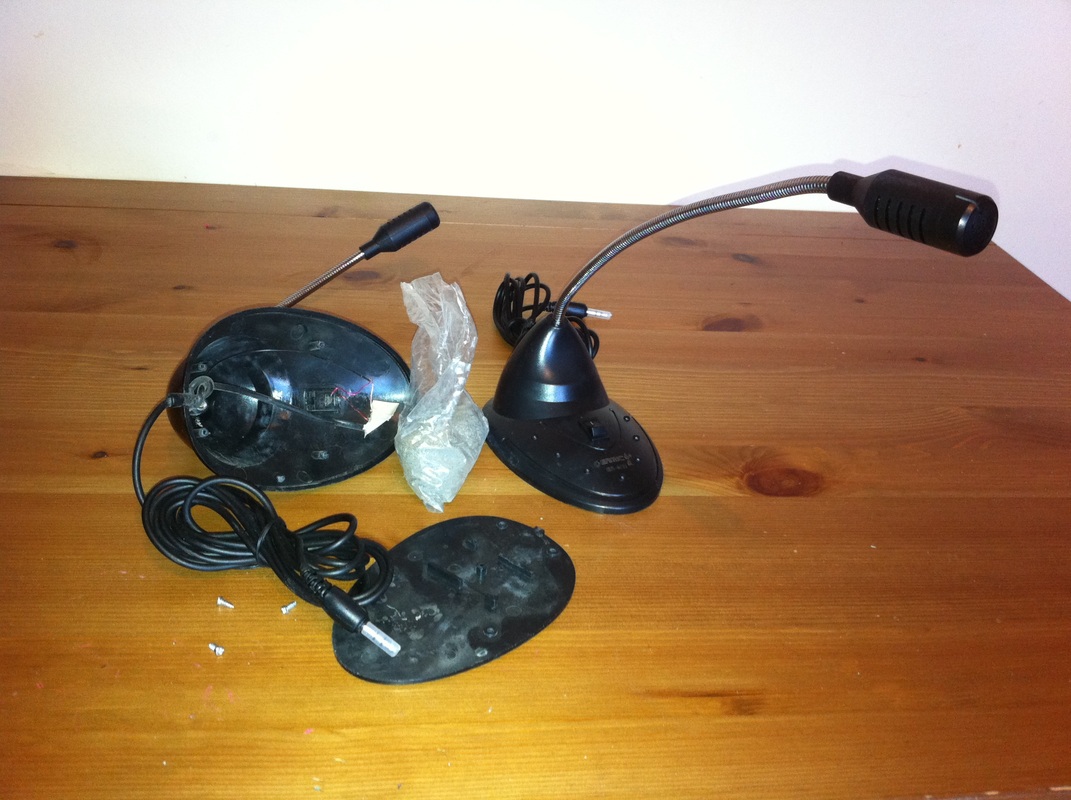
Like any good radio amateur, the first thing I did was take one apart to see how I could add a PTT. As expected the quality inside was only worth £2, but the thing that really surprised me was the bag of grit that had been inserted to add weight to the base!

Picture
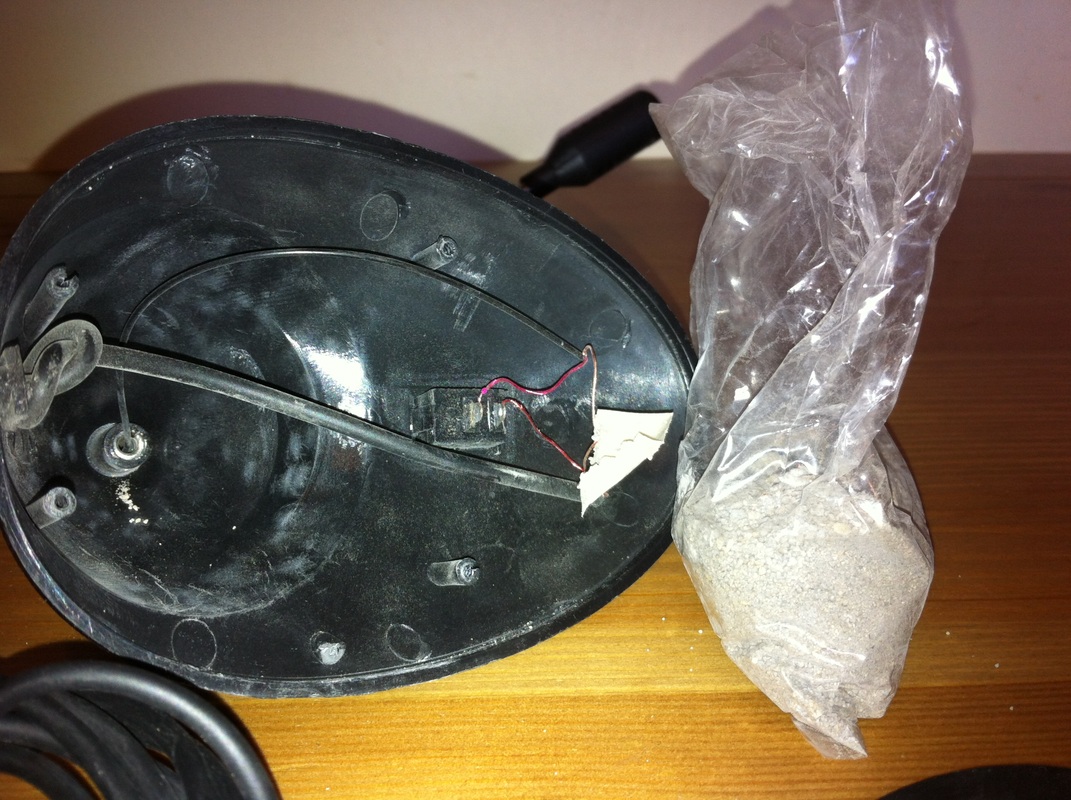
I guess it works, so why not stick with it, but I will be sealing the bag as I spilt half the contents on the floor when I tried to take it out of the microphone!

Next job is to change the flex to some 4 core and add an 8 pin microphone so they can be used with the TS-711 and TS-690S at GB2GP which shouldn’t take long.
2 Comments

Gilwell install

2/7/2012

0 Comments

 
Here are a few old photos of the team installing the radio cabinet at GB2GP. FIrst of all te antennas on the mast
Picture
Then the LDF5-50 run entering the LID building
Picture
30m of LDF 5-50 (for each of three antennas) runs inside the LID store room from the entry point to the celing over the radio cabinet. We installed cable tray to hold the weight of the run
Picture
Finally the radio cabinet after fitting with Frank, M0AEU testing things out.
Picture
0 Comments

At a loss

1/17/2011

1 Comment

 
At a loss

I haven’t blogged for a while – mainly because I have been too busy building stuff to write anything down.

The main focus of my activity has been rebuilding kit to install at Gilwell Park, the Scouts Association’s HQ which holds the special call sign GB2GP. I will write about antennas another day, but I have been rather stumped by some recent measurements I have made on co-ax runs.

The main coax runs at GB2GP will be Andrew Heliax LDF5-50 which is great news. 5-50 is a rigid cable so you have to use a loop of flexible cable around the rotator and other joints. As a result I bought some Ecoflex 10 from Terry at Diode Communications to do that job. It isn’t cheap, but has a good price:loss ratio!

Terry did a great job in rushing the cable to me in bad weather at his end and I made up three lengths to go from the antenna feed point, down the boom (where required), round the rotator and then to the main 5-50 run. These lengths were 13m, 11m and 2m. The antennas are being fitted on a commercial tower by professional riggers so I wanted to make sure the cable assemblies were perfect as there is no second chance to fix mistakes. Using mini db calculator I estimated the losses on the highest frequency that it would be used on and compared them to the losses measured using both my mini VNA and calculated from power read using a Bird 43 wattmeter. The table below shows the losses for each bit of cable (db) and one major issue:

13m Length at 28MHz

11m Length at 50MHz

3m length at 433Mhz

Calculated

Actual

Calculated

Actual

Calculated

Actual

0.3

0.4

0.3

0.35

0.2

0.86

0.86db loss from a 3m length of cable! Shocking! This was the only cable that used a PL259,so I immediately suspected this to be the problem. I called Henry Westlake and ordered some pressure fit PL259s to ensure that the braid was properly installed, but this made no difference at all.

I then wondered if the co-ax itself was not to spec and tested all of the runs on 432MHz as this could highlight any problems:

13m Length at 433MHz

11m Length at 433MHz

3m length at 433Mhz

Calculated

Actual

Calculated

Actual

Calculated

Actual

1.2

1.5

1.0

1.2

0.2

0.86

I am prepared to accept 0.2db variations from spec I had to use some inter series adapters and I am not using calibrated measurement gear, but it looks like I have a problem with that short run. If the PL259 is good, then the N-type at the other end must be the problem! What else can it be? I am at a loss…..
1 Comment

Rotator at GB2GP

9/20/2010

0 Comments

 
I have posted before about rebuilding a ham radios station at the Gilwell Park (GP) Scout Activity centre. The only remaining part of the previous station is a damaged 3 element triband yagi on the 30m commercial tower. This hasn’t been used for two or three years and with the help of employees at Gilwell I am working towards getting the antenna changed by the tower owner.

One problem came to the fore though. If the rotator needed changing as well as the yagi then the riggers would have a much bigger job to do. My task for the weekend was to work out how to reattach the cable dangling down the tower to the rotator control box and see if the antenna would turn.

The control box had a bit of paper on the underside allegedly showing the connections to the main cable run, so on Saturday I popped over to GP and wired the whole thing up from outside the tower compound. The antenna turned but the indicator needle didn’t move at all. I suspected that pot in the rotator head had been damaged, but took the rotator controller home to make sure it was working properly.

Whilst the control box was in bits I discovered a flat spot on the positioning pot in the rotator control box, but luckily I had a similar pot in my junk box so was able to swap it out. I had hoped this was the cause of the non moving needle and it was good to fix but certainly wasn't the core problem!

I went back to GP on Sunday morning to test my handiwork but as per Saturday the antenna was still moving but the indicator needle was remained static. Time for some trouble shooting.

Foolishly, I had used the diagram taped to the base of the control box showing the pin out of the control box, the colours of an intermediate jumper cable and how these both linked to the colours of the cables on the tower to the rotator motor and when things weren't working I realised I shouldn't have been so trusting. I decided that I had to work out role of each cable from scratch. This was made easier as the motor cables were clearly working and only 5 wires were required overall. That said, there were eight wires in the cable to the rotator head! On a couple of control box outputs the thin cables in the multi way jumper cable were being run in parallel to increase the current handling capability, but when I traced these through to the control box it became evident that several poles were being cross wired by the jumper. I thought I had found the problem but when I paired wires up correctly this didn't sort things out. So where now?

Out came the DVM and I started to identify the role of the cables
running down the tower. Once I had eliminated the motor power cables it was quite easy to discover which were the positioning pot in the rotator head. It was a great relief when I saw the resistance changing in this pair as I turned the antenna - the pot in the head was OK, meaning the problem was at ground level and therefore fixable. Phew.

A quick comparison with the erroneous wiring diagram suggested that the original installer had actually wired the jumper cable to the main run like for like i.e. red to red, white to white etc, except of one pair where there had to be a mismatch. As I had already identified the motor pair and two of the control leads I knew that the all the remaining wires on the tower were either unused or the remaining "lost" connection. So, I wired them all in parallel and hey ho the rotator indicator started to turn with the antenna. It was a simple process of elimination to find out which of my parallel set was the real deal.

So overall we have a result as shown in the video below. The antenna turns and the control box follows. I took a look at the main co-ax run to the antenna and the copper is bright - as new. This means we probably don't have to change that run unless I can find enough heliax. More good news!

I will try to get back to GP soon with my soldering iron and VNA. If I put a PL259 on the remaining co-ax and sweep the antenna we will have an idea of performance. It may be that a 2.5 element yagi is usable and I think that this will be a bonus for JOTA in a few weeks time.
0 Comments

Elecraft Band Decoder

9/15/2010

3 Comments

 
New toy alert! I have recently picked up an elecraft band decoder to use with my remote station. Elecraft got the kit over to me quickly and it is now assembled and ready to go.
Picture
This bit of kit means that I can use the TS-480 to switch antennas at my eventual remote QTH. Icom and Yaesu radios are better at handling the band outputs than Kenwoods so the options for the 480 are quite limited but the guys on the TS-480 yahoo group say this one works a treat. I'll give it a go and see.... 
Picture
3 Comments

Gilwell Park station layout

8/27/2010

0 Comments

 
I had an interesting discussion with Frank, M0AEU about the Gilwell Park radio station this week and have been playing around trying to design a station that will be useful for the Scouts and possibly double up as a contest site in the Scout close season. The rules for the station are simple – no wires in places where the scouts can get at them!

That doesn’t preclude temporary antennas for contests. I have done a screen grab of the site from Google earth and marked up some preliminary ideas.
Picture
The site has changed a bit from when this image was taken and the building outlined in blue has been removed and replaced with another one that is a different shape. The radio shack will be in the new building at the spot marked with the arrow. My initial thoughts are to have the following permanent antennas:
  
There is a commercial tower on site, about 90ft tall marked T1. My current plan is to have an HF triband yagi, plus 6m yagi on this tower. This tower would also have a side arm with halyard supporting inverted V dipoles (160, 80 and 40m, marked in purple ends >20ft above the ground). These are oriented east-west at the moment, but I am unsure of the effect of the metal roof blow them. The side arm could also hold a V/UHF vertical.

The second tower, T2, is a 40ft crank up mast with a decent sized stub mast on top. This will be the VHF mast supporting yagis for 2m and 70cm. I also have a butternut HF2V vertical antenna for 160/80/40 that could be hidden in the trees at “Bnut” to provide some low angle radiation on those bands.

This should be a fairly straightforward install as I have most of the kit to do this already.
  
The remaining markings are for temporary antennas that would be set up for contest use. The two green circles (rough scale to include radials) could be full size verticals for 40 and 80m. The yellow dashed lines are along thick hedgerows and could be used for reversible beverage antennas. The 800ft length would be to central America/Japan which makes sense, but I am not sure whether it is worth the effort to install a 400ft one running N/S. Is it worth having an Africa beverage? As you can see form the picture there doesn’t seem to be an easy option to install a North America beverage unless it runs across open land. 

So, play fantasy radio station with me. What would you do on this site and why?
0 Comments

GB2GP Scout radio

6/19/2010

2 Comments

 
I have blogged several times about my involvment with the Scout radio station at Gilwell Park, GB2GP. The shack was lost 2 years ago and the HF yagi took a beating over the winter
Picture
I happened to go over there this wekeend as a group of radio scouts were using GB2GP from a tent with a dipole in the trees. I had a long discussion with a couple of the leading lights at Gilwell and it looks like a rebuild of the radio station is on the cards. I have offered my services and look forwards to getting stuck in and producing a decent station for all of the Scouts that visit the site.
2 Comments

Post Title.

6/3/2008

2 Comments


Over a month since my last post – if anyone is reading that is, but lots has happened on the radio front.

I now have a three element yagis for both 4m and 6m on a telescopic pole in the garden. I finished the rotator installation this morning. I only have one feedline at the moment, 35m of LDF4-50, so until I fit a relay I have to dash out, drop the mast and swap over the n-types. Not ideal, but at least I am on the air.

The miniVNA has been amazing to use during this process. 


The 6m Moonraker antenna was picked up at a rally for £25. I can tell why – it was rubbish! The miniVNA showed that it was resonant on 48.250MHz. Fine for video, hopeless as TX antenna. A quick nibble of the DE with a plumbers pipe cutter and re-adjustment of the gamma match and it is now on 50.1MHz. I have made a number of QSOs via SpE but I am not confident of the design of this antenna, so I will have to model it to see what it is like. More news later


The 70MHz yagi is a DK7ZB 28opm design that I built two years ago. Martin’s website suggests that you mount an flange co-ax socket on the balun box to attach the feed line. I was rather worried about water ingress with this system so decided to use a flying lead and a cable gland instead. This made grounding the co-ax shield a real pain as the IP66 box I had chosen was a bit too small and made the system rather mechanically weak. Upon reviving the antenna, the balun assembly had shorted and I had to cut it out of the box and build a new one. If I build another DK7ZB design I will follow the instructions more closely or use a bigger box! I see that a couple of people are producing kits of materials for these antennas which makes life much easier as we can only get imperial sized materials in the UK.

Bad news on the radio scouting front as the GB2GP shack is to be demolished this summer. This means the APRS station will be taken out of service in July. I must do something about getting a vertical up at home to provide central London coverage. Perhaps radio will get a new home in the redeveloped Gilwell LID, but I am worried that it is no loner sexy enough. We are currently working out what do with all the equipment as it will need storing. More news as I get it!

Good APRS news is that G5YC is now active during office hours from central London. The RF noise is intense in EC1, but it seems to doing some use gating RF to INET. With a better antenna I am sure I can get better coverage.

I have also built a APRS portable tracker based on an open tracker and an FT-60E. The GPS I bought to go with it doesn’t work so I will have to steal the car based version when I go to Southampton tomorrow to see if it works. 

Jobs to do this week are all centred around Region 1HF CW FD which takes place at the weekend. I am providing the full station for G3GHN/p and we will probably do the PW contest at the same time as not all the club can do CW at contest speeds.

2 Comments

    Author

    A few notes on recent radio activity by Steve, M0BPQ.

    Archives

    December 2020
    November 2012
    October 2012
    May 2012
    April 2012
    March 2012
    February 2012
    January 2011
    October 2010
    September 2010
    August 2010
    July 2010
    June 2010
    May 2010
    April 2010
    March 2010
    February 2010
    January 2010
    June 2009
    May 2009
    April 2009
    January 2009
    December 2008
    August 2008
    July 2008
    June 2008
    April 2008

    Categories

    All
    All
    Aprs
    Contests
    Hf Contests
    Projects
    Scout Radio
    Txbpf
    Vhf

    RSS Feed

Powered by Create your own unique website with customizable templates.